How To: Run Any Android App on Your Mac
One of the best features of Android is the fact that it's open-source, giving developers the ability to use it on pretty much any device they can think of, like on a Windows PC using Andy. That's what drove the creators behind the Android-x86 project to port over the mobile OS to any computer running an Intel processor.Their newest release, dubbed Android-x86 4.4-r1, allows anyone with a compatible computer to run Android 4.4.2 KitKat. Since all newer Macs come with an Intel chip, they can all run this release without any problems.While it would be great to be able to install KitKat through BootCamp, that isn't currently possible, so instead, we will use the emulation software VirtualBox to run Android on top of Mac OS X. Please enable JavaScript to watch this video.
Before Getting StartedWhile this Android port can run on pretty much any Intel-based Mac, you will still need to make sure you have at least 10GB of free hard drive space and 4GB of RAM. If not, you will run into performance issues. The Android ISO file and VirtualBox are both free, so go ahead and download both from the links below.Android-x86 4.4-r1 VirtualBox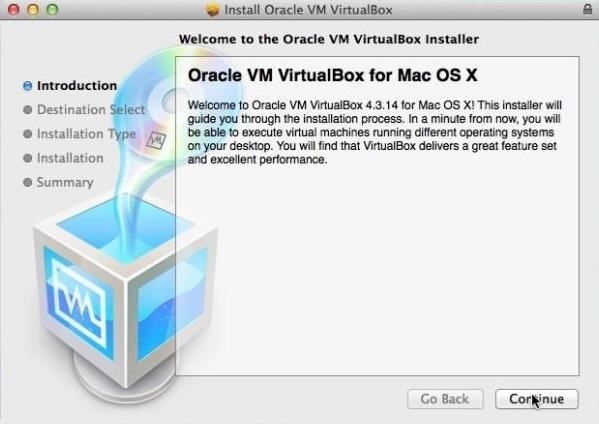
Step 1: Install VirtualBoxNow that you have both files downloaded, you are free to install VirtualBox. Just double-click on the VirtualBox.dmg file and follow the installation guide.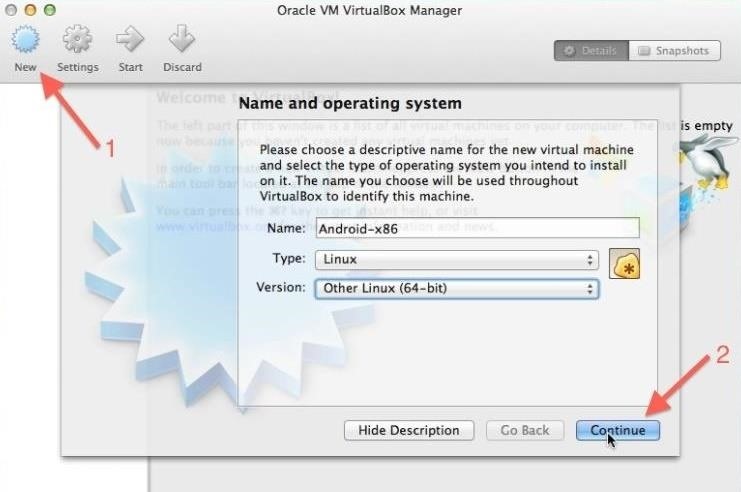
Step 2: Set Up Your New Virtual MachineOpen up VirtualBox after it finishes installing, then tap the New icon on the top left to create a new virtual machine. You can name the machine whatever you want, just be sure to set the Type to Linux and Version to Other Linux. On the next dialog box, enter 512 MB for memory size, then tap Continue. Select the create a virtual hard drive now option and choose VDI as the file type. Under Storage on physical hard drive, select Dynamically allocated. The next screen will allow you choose how much hard drive space you want to give to your new Android machine. I chose to set it to 8GB, but you can select any size you want. After that is done, you're pretty much all set, so tap Create.
Step 3: Create Bootable PartitionYou have now successfully created your virtual machine, so now you'll need to actually create a partition to install Android on to. To start that process, select the new machine from the left sidebar, then click Start. From the installation select screen, locate your Android.iso file, and when that boots up, select Installation, then Create/Modify Partitions. On the next screen, select the New option, then choose Primary as the partition type, making sure it says 8587.19 MB under Size.After it has created the partition, you will be brought back to the partition screen where you will need to highlight your new partition and select Bootable, then Write. Upon choosing Write, you will need to type yes to confirm the changes, then select Quit once finished.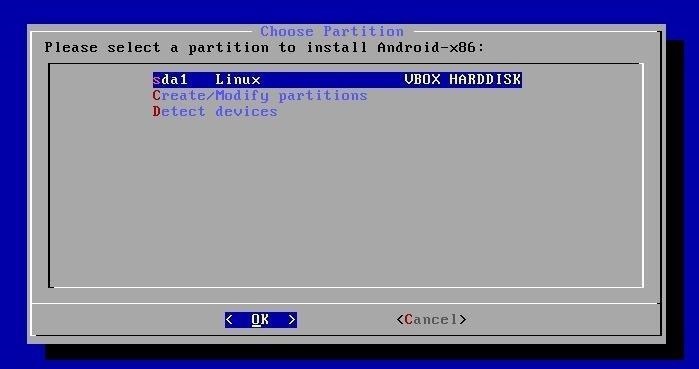
Step 4: Install AndroidAll that is left to do now is install Android, so select sda1 Linux VBOX HARDDISK from the box that popped up and choose ext3 as the format type. You will also need to install GRUB bootloader to properly boot Android, as well as allow your system directory to be read-write. After selecting both of these options, VirtualBox will begin to install Android from the ISO image you provided earlier.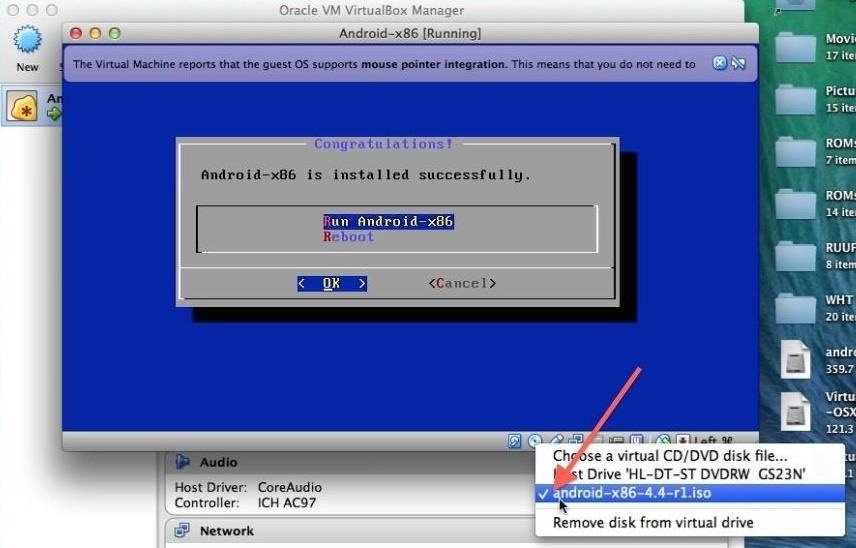
Step 5: First BootThe install is pretty quick, but don not run it after it has completed. You will first need to unmount the ISO by clicking the CD icon on the bottom right of the VirtualBox window and unchecking the android-x86-4.2-20130228.iso option, then selecting force unmount. After the unmount completes, select Reset from the Machine menu bar drop-down. Your new machine will now be ready to go, but the initial boot-up time will be longer than usual because it is optimizing the Dalvik runtime.
Welcome to AndroidOnce the boot up finishes, you will go through the normal Android welcome screens.Your mouse cursor will be stuck inside the VirtualBox window after you start clicking inside of it, so you will need to press the left Command button on your keyboard to free it.Also, you can go ahead and skip the Wi-Fi login prompt because VirtualBox will piggyback off your Mac's internet connection. And there you have it, folks! You are now the proud owner of a Mac that can download and run any Android app that is compatible with KitKat.The ROM that comes preloaded on this build is pretty bare bones, but you can always download whatever you want from the Google Play Store app. Be sure to drop me comment below if you run into any issues getting your virtual machine up and running!
Cover image via Cult of Android
The Easier & Better Way to Control, Track, & Locate Your Lost
It's malware time. A cloud security company named Zscaler revealed that malicious software has been disguised as the Android version of Super Mario Run, which is currently restricted to iOS
Super Mario Run for Android? No, it's malware - Graham Cluley
Adaptive Icons is a cool new feature of Android 8.0 Oreo, which styles apps icons in accordance with the system theme or launcher. It will give a consistent look on the phone. Now, you can get Android 8 Oreo's Adaptive Icons feature on any phone runs Android 5.0 Lollipop and up with latest beta version of Nova Launcher (v5.5).
How to Get Android Oreo Adaptive Icons on Any Android Phone
Report Ad
Buy Flashlights at L.L.Bean. Free Shipping With $50 Purchase.
You can get even cheaper fees using Binance Coins, or BNBs. Binance lets you save money by paying trading fees in Binance tokens. If you plan on making a lot of trades on Binance, then consider buying BNBs and adding them to your bitcoin wallet. Conclusion. Binance is the world's largest cryptocurrency exchange by trading volume.
How to Clean Copper Coins in One Minute - WonderHowTo
How to Send email attachments above the size limit - Internet
Well, you can actually get a new look on your Galaxy Gear, only it's not as simple as just installing a third-party launcher on an Android phone or tablet and setting it as the default. But it isn't really hard, either, and in today's softModder guide, I'm going to show you how to do it.
How To Install Official 4.4 Kit Kat Launcher On Any Android
The Best Mac Torrent Client, Transmission, Is Finally
This wikiHow teaches you how to send an email from your computer as a text message to a phone number. You can do this by entering your recipient's phone number and their carrier's email code in the "To" text field of your email service and then typing in a message.
How to Send Emails From Your Computer to Mobile Phones
Savvy riders know how to get around price fluctuations and avoid peak times to spend less on their way around town. Below are a few of their favorite tips for avoiding Uber surge pricing. 1. Time Your Uber Right. Kevin Adkins from Kenmore Law Group in Los
How to Get Around Uber Surge Pricing - Thrillist
Go back to home screen and simple press the "home button" and select the launcher. Also Read: Download Android APK files Directly from Play store to your Windows PC. I have tried to install android 4.4 Kitkat launcher on Samsung Galaxy Y, Samsung Galaxy S Duos, Samsung Galaxy Grand Duos, HTC One; it worked perfectly on them without any problem.
Download and Install the Android 4.4 KitKat Launcher on a
The Night Sight mode in the Google Camera app for the Google Pixel 3, Pixel 2, and Pixel is incredible. The Google Nexus smartphones were beloved on XDA for their high-end specifications
Google's Night Sight is Blowing Minds: Shoot Photos in Near
The Samsung Galaxy S8 and S8 Plus were announced today, as were new versions of the Gear 360, an updated Gear VR with a motion controller, and a competitor to Siri and Google Assistant. Months of
Galaxy S9 and Gear VR: How not to break your new phone
How To: Remove the Carrier Name from Your Lock Screen in Android Lollipop How To: Change your carrier name on an iPhone How To: Change the Boot Up Sound to Anything You Want on Your Galaxy Note 3 How To: Check for Loose or Worn Carrier Bearing on a Snowblower Toro 824
Change Carrier Name On Android Phone Easily [How To Guide]
How to Prep a thermocouple for a printed circuit board
0 komentar:
Posting Komentar